Interior waterproofing is a strategic mechanical process designed to manage groundwater once it has moved toward or beneath your home’s foundation. Unlike exterior methods that attempt to block water from the outside, interior applications focus on intercepting and redirecting moisture before it can damage your living space.
Knowing exactly where these specialized materials are placed allows homeowners to visualize the “pressure relief” system that keeps their basement bone-dry. By targeting the most vulnerable entry points, you can effectively neutralize the threats posed by high water tables and seasonal storms.
The Sub-Floor Perimeter Drainage Channel
The most critical application site for interior waterproofing is the perimeter of the basement floor, where the slab meets the foundation walls. A narrow trench is excavated into the concrete to house a perforated drainage pipe that acts as the primary collection point for rising groundwater.
- Position the drainage pipe in a bed of clean, washed gravel to ensure a fast and unobstructed flow rate.
- Wrap the entire assembly in a heavy-duty filter fabric to prevent fine silt and soil from clogging the system.
- Ensure the pipe is pitched correctly toward a central collection point to prevent stagnant water.
This sub-floor installation is the “exit ramp” for water that would otherwise be forced up through cracks in the slab by hydrostatic pressure.
The Foundation Wall Vapor Barrier
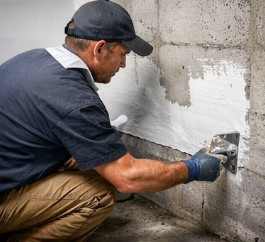
Water vapor and seepage can migrate through porous concrete or masonry units, leading to high humidity and mold growth behind finished walls. To combat this, a thick, antimicrobial vapor barrier is applied directly to the interior face of the foundation walls from the grade line down to the drainage track.
- Use a high-mil-thickness polyethylene or reinforced plastic liner that resists punctures and tears.
- Overlap all seams by several inches and seal them with moisture-resistant construction tape.
- Secure the top of the barrier with a termination bar to prevent humid air from moving behind the liner.
This vertical shield ensures that any moisture “weeping” through the walls is safely directed into the perimeter drainage channel rather than into your basement air.
The Floor-Wall Cove Joint Seal
The seam where the basement floor meets the foundation wall, known as the cove joint, is the path of least resistance for pressurized water. Specialized “dimple boards” or drainage flanges are installed at this junction to bridge the gap between the wall membrane and the sub-floor pipe.
- Install the drainage flange so it sits slightly above the floor level to catch wall seepage.
- Ensure the flange allows for the natural expansion and contraction of the concrete slab.
- Check that the material is made of non-corrosive PVC or high-density polyethylene for long-term durability.
Sealing and draining this specific joint is the most effective way to stop the “flooding” effect that occurs during heavy rainstorms.
The Central Sump Pump Basin
All the water collected by the perimeter drains must have a destination, which is the sump pump basin installed at the lowest point of the basement floor. This heavy-duty plastic or fiberglass tub is recessed into the ground to house the mechanical pumps that will discharge the water away from the house.
- Use a basin with a gas-tight, bolt-down lid to prevent moisture and soil gases from entering the basement.
- Ensure the basin is large enough to house a primary pump and a secondary battery-backup pump.
- Install a check valve on the discharge line to prevent pumped water from flowing back into the pit.
The sump basin acts as the “heart” of the waterproofing system, providing the mechanical force necessary to keep the entire foundation dry.
Structural Crack Injections and Sealants
Localized fractures in the foundation walls or floor slab require direct application of specialized resins or hydraulic cements. These materials are injected deep into the crack to create a flexible, watertight bond that can withstand the natural shifting of the home.
- Utilize high-pressure polyurethane injections for cracks that are actively leaking or under pressure.
- Use epoxy resins for structural cracks that require a high-strength bond to prevent further movement.
- Apply a secondary surface sealant over the repair to ensure a clean, professional finish.
Targeting these specific openings prevents localized “geysers” of water from bypassing your primary drainage system during peak saturation levels.
Ensure the Permanent Stability of Your Foundation
Understanding the precise application points for interior waterproofing materials is the first step toward a permanently dry home. By reinforcing these vulnerable areas, you effectively eliminate the risk of mold, rot, and structural decay.
The peace of mind that comes with a professionally protected basement allows you to utilize every square foot of your property with total confidence. Your home is a significant investment, and a properly applied interior waterproofing system is the most reliable way to preserve its value and safety for generations.